Recently I had been informed that our local Boots store was about to reveal something new to their store, and I had been kindly invited to go and experience it on its first days of opening. Yesterday I was lucky enough to be one of the first to see a brand new counter in store at Boots in Hanley, Stoke-on-Trent! When I had been told which counter it was going to be I was so excited to go and view it anyway, but once I saw it I was really impressed! So which counter has recently opened up do you ask? Of course, welcome to Boots our very own Liz Earle counter!
Boots in Hanley has lots of main brand counters such as Estee Lauder, Clinique, Clarins and so on, but having only being able to purchase Liz Earle products online for click and collect, they now have a brand spanking new counter to purchase all the brilliant products from personally!
Given that this is a new counter for many Boots customers in our area, some people may not of heard of this brand before. Liz Earle was founded in 1995, and it is 'a British beauty brand with years of botanical experience.' The company was founded on the Isle of Wight, and during my visit in store I heard lots of lovely things about where the company originates from and how it is like one big family of passionate Liz Earle workers. Liz Earle products contain 'naturally active ingredients' and they produce a whole range of products such as skincare, hair care, body care and makeup. No matter what your skin type, Liz Earle caters for every type and there is a good use of quality ingredients in every product making each purchase worthwhile, knowing that they have your skins best interest at heart. They also promote a healthy lifestyle and inspire to allow woman and men to be confident in their skin. Most of us try to look after our skin, but it is still important to get out there and have long walks, and this is something the girls at Liz Earle are also passionate about as it becomes part of your wellbeing. Having won many awards such as the Elle Awards, Liz Earle continues to expand and we are lucky enough to now have one of their counters to hand on our doorstep! Heres a little look at the beautiful, brand new counter.
So now lets talk about my experience in store. Keshia who proudly works for Liz Earle kindly invited me to go and take a look around, and I also had the chance to meet more of the team who are lovely and very approachable. As soon as I walked into our local Boots store I spotted the counter straight away with its recognised logo shining bright. The counter is presented beautifully with shelves and shelves of Liz Earle's famous products stocked neatly on them, and everything is displayed clearly. For a person with OCD like me, seeing how everything is organised was great as everything is easily accessible and all together in the right sections. There is even fresh flowers on top of the counter which I think adds a personal touch and makes the atmosphere even more friendly.
At the counter in store the girls will be offering facials, hand and arm massages, head massages and also a makeup service. How fab is this? It is in perfect timing for treating our mums this Mothers Day!.
Keshia started off my experience by showing me all the products available to buy at the counter meaning that I got to see some products that I was not even aware of! Liz Earle are obviously famous for their skincare for face and hands, and their mantra is 'cleanse, tone, moisture' but Keshia here on the counter showed me that they also sell candles, perfumes, hair care, makeup and amazingly they also offer products for men too, so they literally cater for everyone!
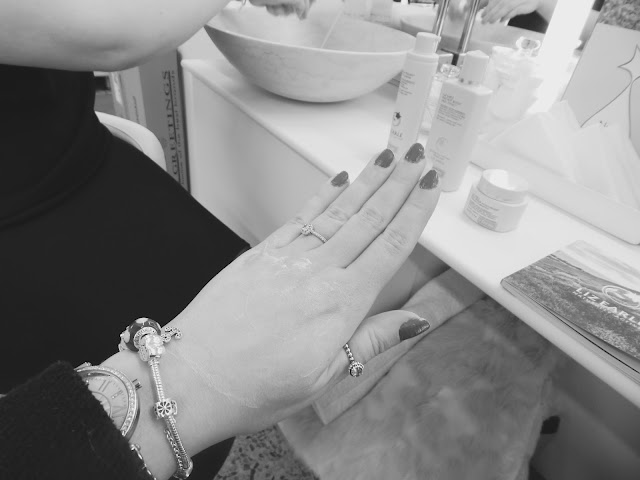
Having as mention above only ever using just one of their skincare products to cleanse my skin when taking my makeup off, Keshia offered to show me the full recommended Liz Earle skincare routine. I have always been a makeup wipe type of girl which has been so bad for my skin in the long run. I think from a young age we take our skin for granted but it is only as we get older we begin to learn that looking after your skin is very important. From starting to use their cleanser my skin has already improved a lot. I had the opportunity to have my makeup taken off to show me properly and have a full Liz Earle facial done, but being as I had a dentist appointment straight afterwards I was worried about having no makeup on and opted to be shown on my hand. Keshia was understanding of this and made me feel better too by acknolowging that other females may find the whole taking your makeup off daunting too! Given that for future reference, they will be having a makeup service fear not, if you do wish to have a facial and be shown the routine they can indeed use their Liz Earle makeup on you to redo your look afterwards!
Liz Earle's 3 steps to great skin!
Liz Earle's 3 steps to great skin!
Liz Earle says 'If you only do one thing to your skin, cleanse, tone & moisturise'. This is the motto that they live by and say if you do this to your skin using their products twice a day you will start to see results in no time. As mentioned, I have previously been using their well known beauty icon, a cleanser which is step number 1 in their routine, and is a multi award winning beauty icon.
They suggest you then follow this up by using a toner for step 2, and step 3 finishing off by moisturising your skin. You can add in an extra step which is a serum for your skin, but for now I will focus on the main 3 steps. I was asked about my own skincare routine to begin with and I explained that sometimes it just has to be quick and snappy as after a long day at work (which I think we are all sometimes guilty of) I just want to go to bed and forget to take my makeup of at times! Keshia explained that the routine to follow is quick and simple but effective, and would definitely be beneficial.
They suggest you then follow this up by using a toner for step 2, and step 3 finishing off by moisturising your skin. You can add in an extra step which is a serum for your skin, but for now I will focus on the main 3 steps. I was asked about my own skincare routine to begin with and I explained that sometimes it just has to be quick and snappy as after a long day at work (which I think we are all sometimes guilty of) I just want to go to bed and forget to take my makeup of at times! Keshia explained that the routine to follow is quick and simple but effective, and would definitely be beneficial.
*Step 1-3 left to right,1-4 if you decide to use the serum, prices are below.*
Keshia started off by using one pump of the cleanser on my hand and massaging it in in circles- obviously this would usually be used on your face. The cleanser is called Cleanse & Polish Hot Cloth Cleanser. It is then recommended that once you have this on your face, you then wash one of the pure muslin cloths (that are an exfoliator in themselves) in warm water to then rinse off the cleanser. Having used this daily when I have had makeup on I can vouch that this product does exactly what it says it will, and you can see your makeup sliding off your skin, leaving it instantly makeup free and refreshed. The Liz Earle cleanser is suitable for all ages and all types of skin, and has 'won over 100 prestigious awards' and was 'named Best Classic Beauty Product' at the CEW Beauty Awards in 2015. The cleanser is in the form of a cream and 'contains purifying eucalyptus oil, toning rosemary and soothing chamoille extracts, plus skin sorting cocoa butter.' The best thing about this product is not only that it wipes away your makeup and your skin is clean instantly, but it lifts away dead skin cells whilst using the muslin cloth.
After step 1 Keshia then moved onto show me step 2 of the routine which I have not used before. Step 2 includes using the Liz Earle Instant Boost Skin Tonic. A dash of the tonic was splashed onto a small round cotton pad, and this (applied to my hand on the day) is to be wiped all around your face. You only need one splash of the tonic as it is quite generous in itself when pouring. The tonic 'refreshes, revitalises, and brightens' your skin and the best thing about it is that it is alcohol free so it is harmless to your skin. Hearing all about the ingredients once again, it just shows you how natural and pure the Liz Earle products are. This tonic contains 'aloe vera, calendula, and Vitamin E' and it has a lovely smell of roses.
Finally step 3 of the famous skincare routine is to apply the Liz Earle Skin Repair moisturiser. Now I love a good moisturiser but for my face it has to be the right one. I find some too heavy and greasy and then at the other end of the spectrum some can be too light and does not do the job. When this was applied to my hand my skin felt instantly soft and smooth and once again the smell was so pure and it just makes you feel relaxed. The mousitourisers include "naturally active skin-conditioning ingredients' and 'antioxidants' which help to leave the skin as described above. The great thing about this moisturiser is that there is 3 types so you can pick the one that suits your skin whether it be dry, combined or normal.
The Liz Earle face Serum which is part of the Superskin range as shown in the picture above was recommended by one of the girls as it helps to penetrate beneath your skin to rebuild the cells, as daily we loose the top layer so we also need to look after the layers below that eventually rise to the top, something I would never think about! This step in the routine however is optional.
The Liz Earle face Serum which is part of the Superskin range as shown in the picture above was recommended by one of the girls as it helps to penetrate beneath your skin to rebuild the cells, as daily we loose the top layer so we also need to look after the layers below that eventually rise to the top, something I would never think about! This step in the routine however is optional.
I was so thankful to be shown the routine above so that I can now start a good routine and get my skin feeling the best it can. The girls at the counter were so helpful and by using the products themselves they have such a great knowledge of which products to use etc and can explain fully what they include and how they help your skin. I felt really relaxed and had a lovely chat with them on some beautiful white leather chairs.
The products above are all sold separately (links included) as if like me to begin with you may only wish to try one at a time, but they do have sets pre packed available where you can buy them all together which is really handy for your first time especially when if you wish to buy all the products in one go!
You can find an example of a set beautifully boxed here.
You can find an example of a set beautifully boxed here.
*Sold separately or in sets shown below*
After being shown the famous skincare routine I moved on and had a little nosey at their fragrances that they sell as I was not aware that they existed, and I was quite curious to find out about them. They are in perfect little bottles and have lovely natural shades of colour to the packaging.
The Botanical Essence Fine Fragrance Collection is fantastic, the smells from each one are so distinct and strong that I loved every single one of them and I couldn't choose a favourite! The best thing about these is that they are '87% naturally derived' and they 'have been created using the finest quality ingredients from around the world and are handcrafted.' Prices range from £49 but this is a small price to pay for a lingering scent I think, having spent over £100 on a bottle of perfume that you cannot smell after 10 seconds! They range from number 1, 15, 20 and 100 (left to right). They are all on my wish list now, and are perfect as little gifts for Liz Earle lovers!.
Overall I thoroughly enjoyed my experience at the new Liz Earle counter in the Boots- Hanley store. I would like to thank the girls for having me and making me not only feel welcome and wanting to go back, but for also making me more aware of the amazing products that they sell and also giving me handy tips to help me in the future with my skin care routine. I will most definitely be visiting the counter to keep stocked up on my favourite products, and occasionally have a treat of something new! Don't forget you can still purchase your Liz Earle products from their online site for any readers who do not live in Stoke-on-Trent, and also you can find their products on Boots online. You may already be lucky and have a counter in your area in your local boots, but for us this is the start of something great!
Now for something you should not miss... for my readers who do live in or around Stoke on Trent, to welcome Liz Earle into our local Boots store they currently have a fab competition running as shown below where you can win an ultimate hamper worth over £200!
Alls you need to do to enter is shop in the Hanley Boots store and fill out a 'Keep in touch' card at the counter to be in with a chance of winning the amazing products shown above! Pop in store to our new counter today to see the lovely girls, you will have a fabulous time and they will look after you! I had a great time, now they are waiting for you!
I have some generous goodies to try thanks to Liz Earle and I cannot wait to use them all!
You can find Liz Earle and keep up to date with their products on the different social media platforms by following the links below.
Twitter: @lizearle
Facebook: /lizearle
Instagram:lizearlebeautyco
Pintrest: /lizearle
Youtube: /LizEarleBeauty
Do you use any of Liz Earle's products? If so which is your favourite?
xxxxxxxx


