Showing posts with label beauty. Show all posts

Thursday, 18 February 2016

Liz Earle polishes up our local Boots store!

Recently I had been informed that our local Boots store was about to reveal something new to their store, and I had been kindly invited to go and experience it on its first days of opening. Yesterday I was lucky enough to be one of the first to see a brand new counter in store at Boots in Hanley, Stoke-on-Trent! When I had been told which counter it was going to be I was so excited to go and view it anyway, but once I saw it I was really impressed! So which counter has recently opened up do you ask? Of course, welcome to Boots our very own Liz Earle counter!


Boots in Hanley has lots of main brand counters such as Estee Lauder,  Clinique, Clarins and so on, but having only being able to purchase Liz Earle products online for click and collect, they now have a brand spanking new counter to purchase all the brilliant products from personally! 
Given that this is a new counter for many Boots customers in our area, some people may not of heard of this brand before. Liz Earle was founded in 1995, and it is 'a British beauty brand with years of botanical experience.' The company was founded on the Isle of Wight, and during my visit in store I heard lots of lovely things about where the company originates from and how it is like one big family of passionate Liz Earle workers. Liz Earle products contain 'naturally active ingredients' and they produce a whole range of products such as skincare, hair care, body care and makeup. No matter what your skin type, Liz Earle caters for every type and there is a good use of quality ingredients in every product making each purchase worthwhile, knowing that they have your skins best interest at heart. They also promote a healthy lifestyle and inspire to allow woman and men to be confident in their skin. Most of us try to look after our skin, but it is still important to get out there and have long walks, and this is something the girls at Liz Earle are also passionate about as it becomes part of your wellbeing. Having won many awards such as the Elle Awards, Liz Earle continues to expand and we are lucky enough to now have one of their counters to hand on our doorstep! Heres a little look at the beautiful, brand new counter.


So now lets talk about my experience in store. Keshia who proudly works for Liz Earle kindly invited me to go and take a look around, and I also had the chance to meet more of the team who are lovely and very approachable. As soon as I walked into our local Boots store I spotted the counter straight away with its recognised logo shining bright. The counter is presented beautifully with shelves and shelves of Liz Earle's famous products stocked neatly on them, and everything is displayed clearly. For a person with OCD like me, seeing how everything is organised was great as everything is easily accessible and all together in the right sections. There is even fresh flowers on top of the counter which I think adds a personal touch and makes the atmosphere even more friendly. 
At the counter in store the girls will be offering facials, hand and arm massages, head massages and also a makeup service. How fab is this? It is in perfect timing for treating our mums this Mothers Day!. 


 Keshia started off my experience by showing me all the products available to buy at the counter meaning that I got to see some products that I was not even aware of! Liz Earle are obviously famous for their skincare for face and hands, and their mantra is 'cleanse, tone, moisture' but Keshia here on the counter showed me that they also sell candles, perfumes, hair care, makeup and amazingly they also offer products for men too, so they literally cater for everyone!


Having as mention above only ever using just one of their skincare products to cleanse my skin when taking my makeup off, Keshia offered to show me the full recommended Liz Earle skincare routine. I have always been a makeup wipe type of girl which has been so bad for my skin in the long run. I think from a young age we take our skin for granted but it is only as we get older we begin to learn that looking after your skin is very important. From starting to use their cleanser my skin has already improved a lot. I had the opportunity to have my makeup taken off to show me properly and have a full Liz Earle facial done, but being as I had a dentist appointment straight afterwards I was worried about having no makeup on and opted to be shown on my hand. Keshia was understanding of this and made me feel better too by acknolowging that other females may find the whole taking your makeup off daunting too! Given that for future reference, they will be having a makeup service fear not, if you do wish to have a facial and be shown the routine they can indeed use their Liz Earle makeup on you to redo your look afterwards!

Liz Earle's 3 steps to great skin!

Liz Earle says 'If you only do one thing to your skin, cleanse, tone & moisturise'. This is the motto that they live by and say if you do this to your skin using their products twice a day you will start to see results in no time. As mentioned, I have previously been using their well known beauty icon, a cleanser which is step number 1 in their routine, and is a multi award winning beauty icon.


They suggest you then follow this up by using a toner for step 2, and step 3 finishing off by moisturising your skin. You can add in an extra step which is a serum for your skin, but for now I will focus on the main 3 steps. I was asked about my own skincare routine to begin with and I explained that sometimes it just has to be quick and snappy as after a long day at work (which I think we are all sometimes guilty of)  I just want to go to bed and forget to take my makeup of at times! Keshia explained that the routine to follow is quick and simple but effective, and would definitely be beneficial. 

*Step 1-3 left to right,1-4 if you decide to use the serum, prices are below.*

Keshia started off by using one pump of the cleanser on my hand and massaging it in in circles- obviously this would usually be used on your face. The cleanser is called Cleanse & Polish Hot Cloth Cleanser. It is then recommended that once you have this on your face, you then wash one of the pure muslin cloths (that are an exfoliator in themselves) in warm water to then rinse off the cleanser. Having used this daily when I have had makeup on I can vouch that this product does exactly what it says it will, and you can see your makeup sliding off your skin, leaving it instantly makeup free and refreshed. The Liz Earle cleanser is suitable for all ages and all types of skin, and has 'won over 100 prestigious awards' and was 'named Best Classic Beauty Product' at the CEW Beauty Awards in 2015. The cleanser is in the form of a cream and 'contains purifying eucalyptus oil, toning rosemary and soothing chamoille extracts, plus skin sorting cocoa butter.' The best thing about this product is not only that it wipes away your makeup and your skin is clean instantly, but it lifts away dead skin cells whilst using the muslin cloth.


After step 1 Keshia then moved onto show me step 2 of the routine which I have not used before. Step 2 includes using the Liz Earle Instant Boost Skin Tonic. A dash of the tonic was splashed onto a small round cotton pad, and this (applied to my hand on the day) is to be wiped all around your face. You only need one splash of the tonic as it is quite generous in itself when pouring. The tonic 'refreshes, revitalises, and brightens' your skin and the best thing about it is that it is alcohol free so it is harmless to your skin. Hearing all about the ingredients once again, it just shows you how natural and pure the Liz Earle products are. This tonic contains 'aloe vera, calendula, and Vitamin E' and it has a lovely smell of roses. 


Finally step 3 of the famous skincare routine is to apply the Liz Earle Skin Repair moisturiser. Now I love a good moisturiser but for my face it has to be the right one. I find some too heavy and greasy and then at the other end of the spectrum some can be too light and does not do the job. When this was applied to my hand my skin felt instantly soft and smooth and once again the smell was so pure and it just makes you feel relaxed. The mousitourisers include "naturally active skin-conditioning ingredients' and 'antioxidants' which help to leave the skin as described above. The great thing about this moisturiser is that there is 3 types so you can pick the one that suits your skin whether it be dry, combined or normal.
The Liz Earle face Serum which is part of the Superskin range as shown in the picture above was recommended by one of the girls as it helps to penetrate beneath your skin to rebuild the cells, as daily we loose the top layer so we also need to look after the layers below that eventually rise to the top, something I would never think about! This step in the routine however is optional. 

I was so thankful to be shown the routine above so that I can now start a good routine and get my skin feeling the best it can. The girls at the counter were so helpful and by using the products themselves they have such a great knowledge of which products to use etc and can explain fully what they include and how they help your skin. I felt really relaxed and had a lovely chat with them on some beautiful white leather chairs. 
The products above are all sold separately (links included) as if like me to begin with you may only wish to try one at a time, but they do have sets pre packed available where you can buy them all together which is really handy for your first time especially when if you wish to buy all the products in one go!
You can find an example of a set beautifully boxed here.

                                                        *Sold separately or in sets shown below*


After being shown the famous skincare routine I moved on and had a little nosey at their fragrances that they sell as I was not aware that they existed, and I was quite curious to find out about them. They are in perfect little bottles and have lovely natural shades of colour to the packaging.


The Botanical Essence Fine Fragrance Collection is fantastic, the smells from each one are so distinct and strong that I loved every single one of them and I couldn't choose a favourite! The best thing about these is that they are '87% naturally derived' and they 'have been created using the finest quality ingredients from around the world and are handcrafted.' Prices range from £49 but this is a small price to pay for a lingering scent I think, having spent over £100 on a bottle of perfume that you cannot smell after 10 seconds! They range from number 1, 15, 20 and 100 (left to right). They are all on my wish list now, and are perfect as little gifts for Liz Earle lovers!. 

Overall I thoroughly enjoyed my experience at the new Liz Earle counter in the Boots- Hanley store. I would like to thank the girls for having me and making me not only feel welcome and wanting to go back, but for also making me more aware of the amazing products that they sell and also giving me handy tips to help me in the future with my skin care routine. I will most definitely be visiting the counter to keep stocked up on my favourite products, and occasionally have a treat of something new! Don't forget you can still purchase your Liz Earle products from their online site for any readers who do not live in Stoke-on-Trent, and also you can find their products on Boots online. You may already be lucky and have a counter in your area in your local boots, but for us this is the start of something great!

Now for something you should not miss... for my readers who do live in or around Stoke on Trent, to welcome Liz Earle into our local Boots store they currently have a fab competition running as shown below where you can win an ultimate hamper worth over £200!


Alls you need to do to enter is shop in the Hanley Boots store and fill out a 'Keep in touch' card at the counter to be in with a chance of winning the amazing products shown above! Pop in store to our new counter today to see the lovely girls, you will have a fabulous time and they will look after you! I had a great time, now they are waiting for you!


            I have some generous goodies to try thanks to Liz Earle and I cannot wait to use them all! 


You can find Liz Earle and keep up to date with their products on the different social media platforms by following the links below.
Twitter: @lizearle
Facebook: /lizearle
Instagram:lizearlebeautyco
Pintrest: /lizearle
Youtube: /LizEarleBeauty


Do you use any of Liz Earle's products? If so which is your favourite?

xxxxxxxx

Monday, 30 March 2015

Halo Hair Extensions - Part 2

So hopefully you will of all seen Part 1 of my Halo Hair Extensions post... Here I bring to you Part 2! In this post I will be including some before and after shots of my hair, and a simple step by step guide to applying your halo extensions and achieving a natural look!
Here is me with my normal day to day hair! No hair extensions; all real! I hate my hair because It never grows past a certain length and so because of this I love to invest in hair extensions to give it more length and volume. I have tried everything to get my hair to grow but as much as it must do because I get roots, it never seems to get any longer!


What you will need to create your new look!
To help you easily apply your new Halo Hair Extensions you will need a brush, a parting comb, some clips and your straighteners if your going for the 'straight hair' look. For the purpose of this post I am keeping my hair straight to show an everyday look.


I love that Halo Hair Extensions include instructions with their products. Even if you know what you are doing with extensions and can apply them with your eyes closed; its good to have something to look back on. These instructions provide you with general guidance on how to apply your halo hair. Some people choose to apply theirs in different ways, its completely up to you as you will know where your hair needs more extensions once you start to put them in. 
*Please ignore my horrendous roots in photos that you are about to see, I am booked in and waiting to get my hair done- which can't come quick enough!! Also the lighting is funny in some of the photos as today has been quite a gloomy day and it has gone from dull to sunny to dull and so on. Some of the photos you see you may think 'omg those extensions do not match her hair colour' but trust me they do. I just have so many different blonde/brown shades in my hair and like I mentioned above the lighting shows them in different colours. The end product photos are more natural and you can see the colour match much clearer*

Step 1
Gathering your Halo Hair Extensions together.

When I get new hair extensions, I am always so excited to open them! First you need to untie them from the packet.  Be careful that you do not cut any hair off when trying to cut the ties!


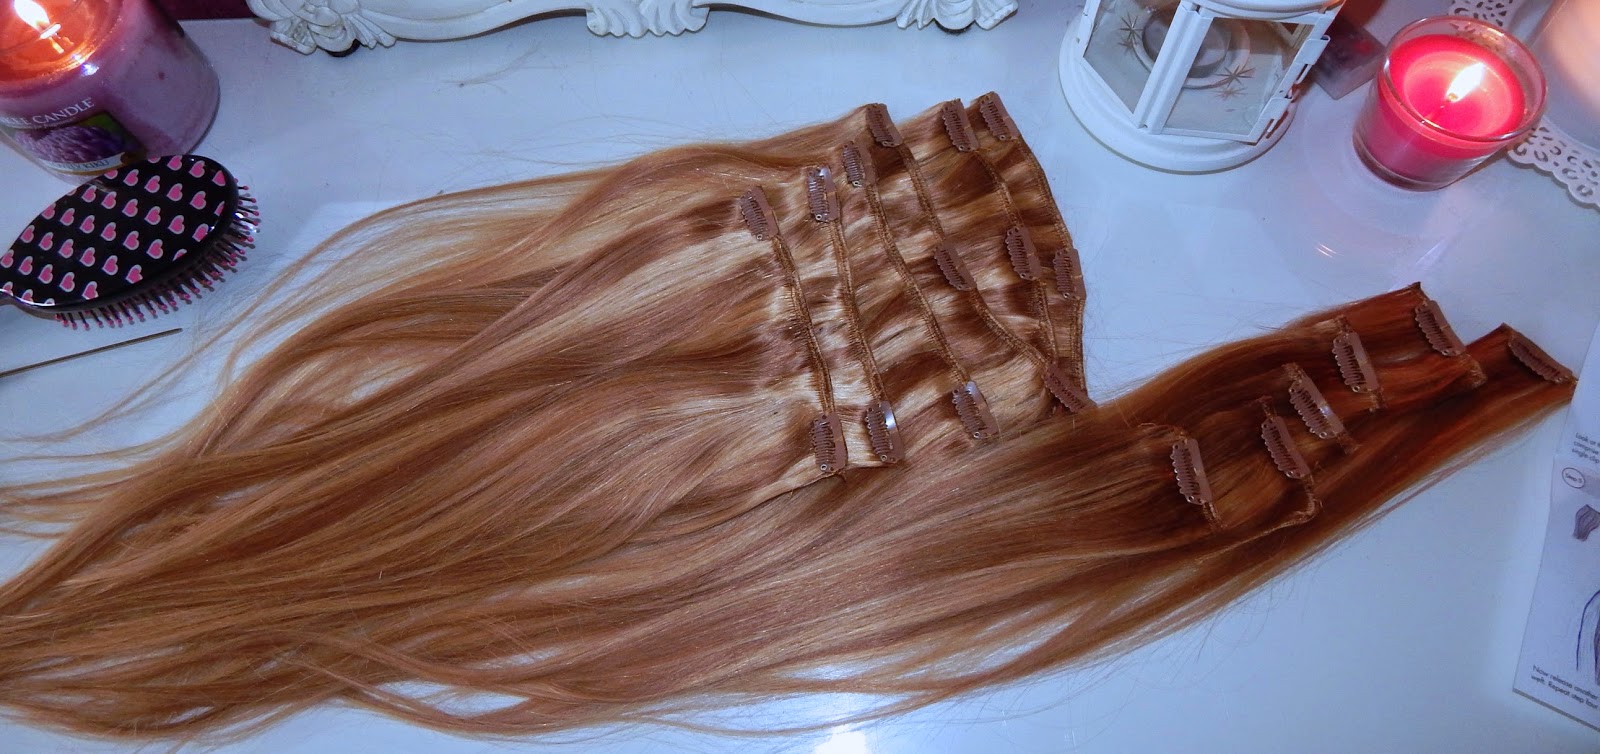
The next thing I like to do when applying my hair is sort out the extensions into piles which have the same amount of clips in. This just makes applying them easier as you can see which ones you still have left in terms of width.


These extensions as mentioned in my Halo Hair Extensions Part 1 post are in the shade Golden Brown/Sweedish Blonde Mix - #12/20. They are 20" long, and cost £99.99 to buy as part of their Deluxe clip- in set. The photo above shows them to be a lot more browner than blonde, but they aren't its literally just the lighting. They are a lovely mix of brown and blonde shades.

Step 2
Applying your Halo Hair Extensions.

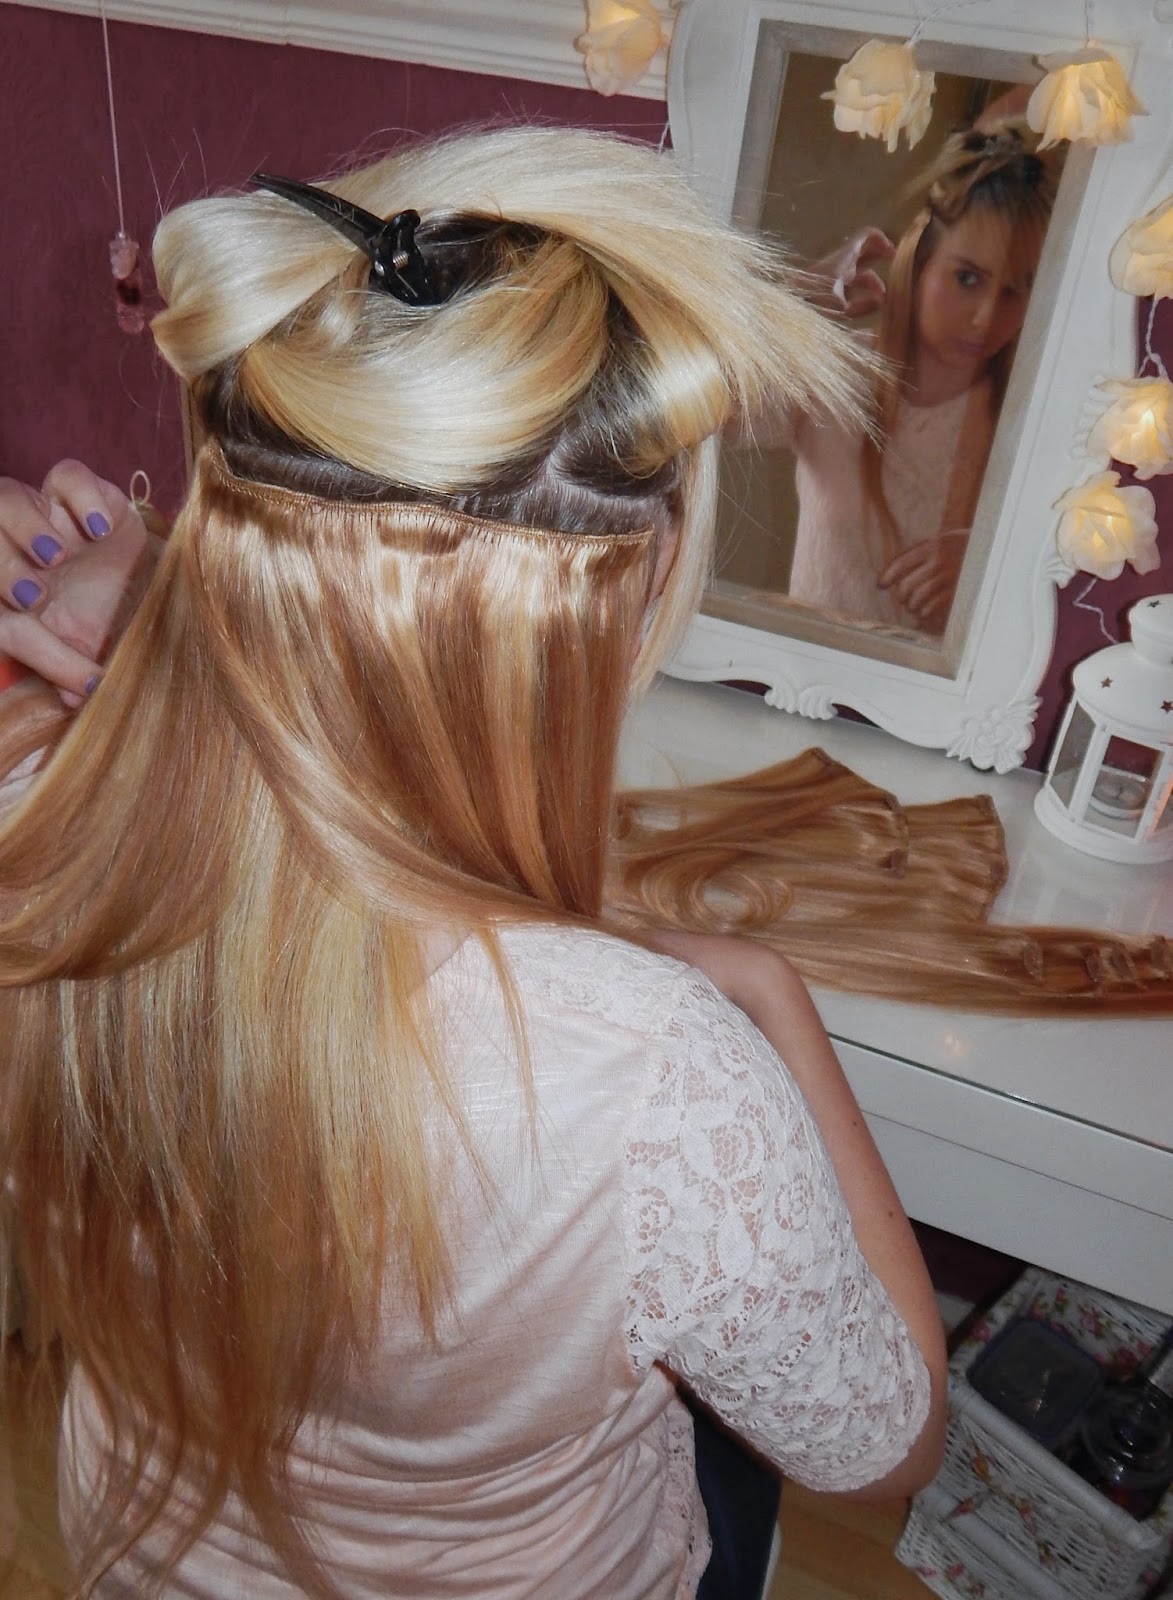
First either using your fingers or a separating comb, tie up the majority of your hair leaving the bottom strand free. The idea with extensions is that you work your way from the bottom up to the top.  Here are those nasty roots that I have warned you about... I have been trying to be good and not get my hair coloured as much to try and let it grow, but because of that I now have major root-age going on! This post is as real as it comes, I obviously could not hide away my roots as I needed to show a separation of the hair picture. We're all girls anyway right and have seen them before?!


After separating your hair and clipping it up, you need to start off with the extensions that contain 'two clips'. The set that I am using is a Deluxe set and contains 12 hair pieces! Perfect for my hair because its so thick. Pick up the extensions piece, open the clips and grab them onto your hair then close them. Its as simple as that!


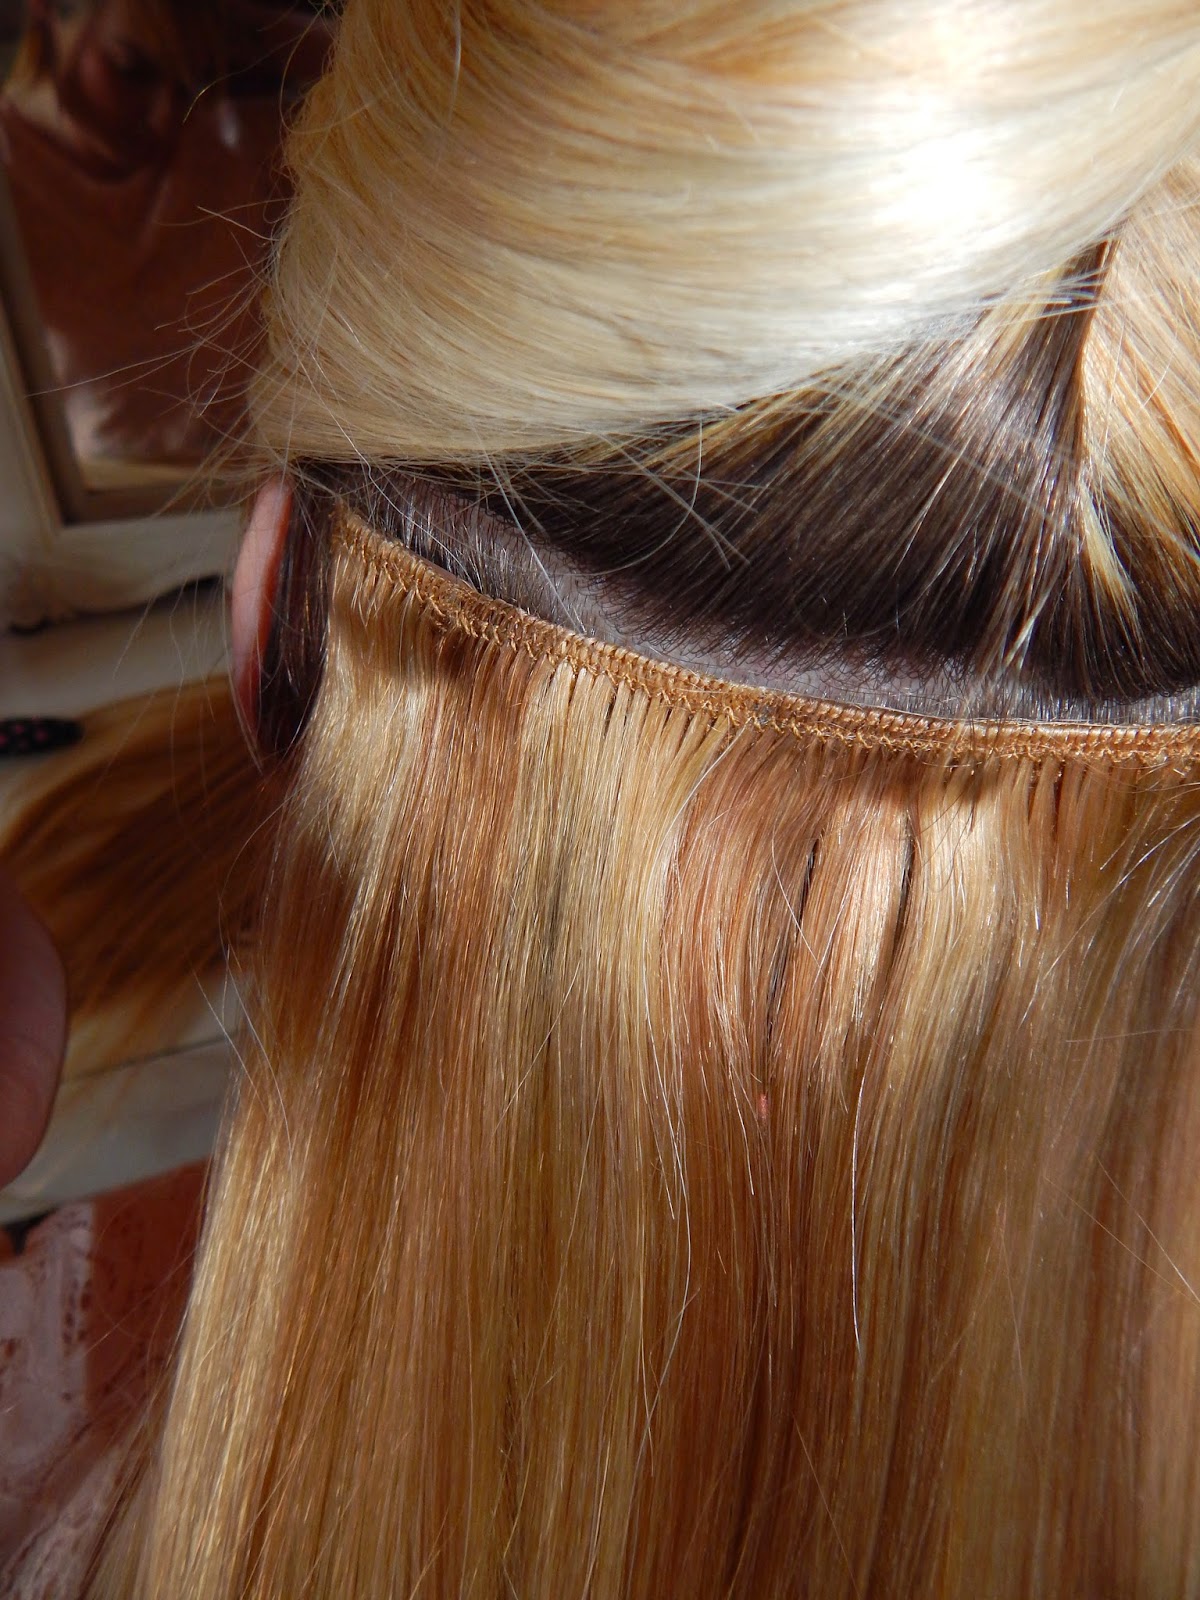
Here you can see the fitting close up. I attach them right to the top of the hair as this prevents them from slipping down and gives a tighter fitting. Once you have applied your first one. Separate and pull another layer of hair down and do the exact same as above. You use all of your 'two clip' pieces until you get to the top of your ears.


What I have noticed when applying my Halo Hair Extensions is that the clips are firmly attached to the extensions. I have brought some hair before where the clips were originally attached, but after applying them they became loose and eventually I had to sow them back on. This is not what you want when you pay out all that money for lovely hair. These clips are attached well and you can really feel the grip when you place them in your hair. 
Once you have used up your 'two clip' hair pieces. Its time to move onto the pieces of hair that contain 3 clips. These are wider to fit around your head as you continue to work your way up to the top of the hair. Separate your hair now so that all the hair that is above your ears is clipped up. This is obviously the middle part and for me this is my main area where I need to apply lots of hair pieces to keep it looking natural with my hair being so thick. 


 The hair pieces with 3 clips attached are my absolute fav. This is because they cover almost all of your own hair, meaning it is all hidden and you start to see the beautiful hair that you are now wearing! Start from the side and work your way around placing in your '3 clips' pieces. Once you have covered the layer of hair all around ... separate and pull another layer down and do the same again! You should use all of the '3 clip' pieces, and hopefully like me you will find that now all of your hair has been filled with your new halo! Once you have finished these steps pull down the last top layer of your own hair and it should hopefully blend in with your long locks!
After concentrating on the back of your head, its time to finish off by using the '1 clip' pieces to fill in from the front your hair that is around your face. 
Here you can see what I mean about the lighting from todays weather! Excusing that... once you have used your single clip-ins at the sides of your face... Your halo is officially in!


Step 3
Styling your new halo hair!

There are so many different styles you can create when you have long hair. For me my two favourite styles are straight and wavy. I like to keep it simple as just having that added 20" long hair is a bonus alone for me, and Im happy to keep it plain and simple. Start by brushing your hair. This blends in any of your own natural hair that may be poking out. I sometimes have to separate my hair at the sides again to straighten it out which is what you can see me doing below. 


For this post I chose to keep it straight to show a natural day to day style as I mentioned at the beginning, but here is how I finished off my look...


 I absolutely love my Halo Hair Extensions. Regardless of some of the funny shades of lighting on my photos, from the two above you can see how naturally they blend in with the rest of my hair. I love a mixed blonde look rather that one plain colour. Not only do I now have lovely long hair, the actual hair itself that is 100% Indian Remy Human Hair is so so soft!

Here are some before and after photos for you to see the difference a halo can make! I have loved being a part of Project Halo!


*You can find Halo Hair Extensions using the following links*
xxxx
*This post comes to you as a review - products sent to me by Halo Hair Extensions in relation to Project Halo*

Tuesday, 25 November 2014

HD Brows: my first treatment review!


I have never really been a girl who looked after her eyebrows *shameful*. I have always admired other peoples, and always wanted nice eyebrows but after going to different salons having them waxed I just grew to think 'they will always look the same'. As your all probably aware, HD Brows entered the scene and everyone has gone MAD for them! I had no idea what these were, where to get them done, or how much they would cost. For a while I brushed off the thought of having any, but then I saw lots of girls posting pictures on Instagram with them and I then developed HD Brow envy!. 
Luckily a few weeks ago I saw that a lovely girl called Abbie who I met through a friend at uni had qualified in this, and she started to put up before and after photos of the work she had been doing. This sold it to me, I needed those brows! I decided to contact her to find out more about them. Abbie told me that they were completely harmless, easy to do and almost always get the best results. I was told that I would need a patch test before having my eyebrows done just to make sure I was okay to have the tint on them, and that I wasn't allergic in any way. Abbie kindly sent me one of these out free of charge through the post. Here it is below:


So here was my patch test. It came in a cute little pouch which contained the patch test itself and an instruction booklet. This patch test is so so easy to use and takes only a few seconds to apply.


As you can see above, the patch test is just a little transfer that you peel off a sheet, place it on your skin (can be arm near the wrist or just below the elbow), wet it until it is all covered then hold for about 30 seconds until the paper just slides away from it - a bit like one of those transfer ticket tattoos you can get. Once the transfer is on it is important not to get it wet for 48hours. I originally thought that these change colour if you become sensitive or allergic to the dye, but it doesn't it is just to see if you get any irritation to the skin from it like itching or burning, or more importantly a rash. If any of these symptoms occur it tells you in the instruction booklet what to do, and then unfortunately the dye is not for you. I have such sensitive skin and I was really worried that I wouldn't be able to get my brows done, but I was completely fine!
After the 48 hours was up and I had no reaction to the patch test I knew my next move was to book an appointment with Abbie asap. I booked in my appoinment and couldn't count down the days fast enough to getting my brows done. Abbie has recently started working at a lovely little hair and beauty salon called The Strand. This is based in Cheadle in Stoke on Trent.  You can find your local HD Brow Stylist by clicking here.
When I went to The Strand I was greeted by the hairdresser who told me to take a seat while I waited for Abbie to finish with her previous client. The salon is beautiful, and so modern and clean! I knew the price that I was going to be charged before hand; £20 as an introductory offer, bargain! I was so excited. 


Upon having my eyebrows done I learnt that there was basically 7 simple steps to creating the perfect HD Brow. They are as follows:

1. Consultation -  When I went in I entered a beautiful beauty room which was spotless clean and looked lovely and professional. Abbie  helped me to determine which brow shape would suit my face seen as there are lots of different shapes and sizes, and what colour I would like my brows to be; cool, warm etc. Then there is a few forms to fill in - just little basic details about any medical info they may need to know etc. My eyebrow make-up was taken off to ensure the skin around them was nice and clean to start the process.  
2. Tinting – Once I had chosen the colour of the tint that I wanted the dye was left on for a minute and was then swept off with cotton pads just to get off any excess. Your eyebrows also get stencilled to measure up for the sizing, and to help find that beautifully shape. 
3. Waxing – This bit is pretty straight forward. I have had my eyebrows waxed before and I find it less painful than tweezing so I was completely fine with this.  
4. Trimming – Next my eyebrows were combed through and trimmed to ensure they were both the same size etc.  
5. Threading – I have seen so many girls have their eyebrows threaded and it left them so red and they looked like they were in so so much pain! This is the part I was most scared of because I am a wimp anyway so the thought of being in pain around the eye area was the only off-putting thought for me. Threading is used above the brow and basically just gets rid of any unwanted 'fluff'.  
6. Tweezing – After all this it was time to get the tweezers out and I hate tweezers. As soon as plucking begins my eyes start to water but I just took deep breaths in and got on with it as I knew the result would be worth it in the end. My eyes did intact water which made my mascara run into my eyes... but I was fine and it was over with in seconds!  
7. Aftercare – Abbie then ran me through how to care for my fab new brows. I was asked several times about the shape, the colour of the tint and whether or not I was happy. She was really friendly with me and just wanted the best for me and my chosen eyebrow look. I stood up and she filled in any sparse areas with the HD brow kit. She also showed me how to make the most of my eyebrows with the makeup so that I knew how to do it in the following weeks until I re-book in again for maintenance. 

Here are some photos of the before, during and after looks of my eyebrows!


^^^.Before.^^^


^^^.During.^^^


 ^^^.After.^^^


^^^.After.^^^

I am so thankful to Abbie and Im so glad I went through with it and had them done. She has been so friendly and works magic! If any of you live nearby you should definitely make an appointment to see her if your thinking of having your eyebrows done!
I absolutely love my eyebrows and I have had SO many people comment on them. I feel like they have really defined my face, and now even when I have zero makeup on I now feel comfortable to a certain level as I know my eyebrows are done :) I would really recommend HD Brows, they're so easy to achieve and if you don't get your wanted look after your first session, it can be achieved later on down the line with some patience.
I am booked in for 5 weeks prior to my appointment for some maintenance work as it is recommended every 4 weeks but due to christmas coming up meaning a hectic schedule at work I was allowed to stretch to 5 weeks. I can't wait to go back, I have had them done now for 2 weeks and they still look just as fab as they did in the first place!

You can find out more about HD Brows by visiting there website or using the link here.
You can also check out The Strand Hair & Beauty Salon by visiting them on Facebook here.
Abbie is available on Facebook & Instagram...  and she works her magic on lots of beauty work including fab nails! Just click the links to find out more!
Abbie Victoria Beauty & Nails - FACEBOOK
Abbie Victoria Beauty & Nails - Instagram 


Are you a HD Brow lover? Have you had them done?


xxxxxx

Link within

Related Posts Plugin for WordPress, Blogger...