Showing posts with label Hair. Show all posts

Monday, 30 March 2015

Halo Hair Extensions - Part 2

So hopefully you will of all seen Part 1 of my Halo Hair Extensions post... Here I bring to you Part 2! In this post I will be including some before and after shots of my hair, and a simple step by step guide to applying your halo extensions and achieving a natural look!
Here is me with my normal day to day hair! No hair extensions; all real! I hate my hair because It never grows past a certain length and so because of this I love to invest in hair extensions to give it more length and volume. I have tried everything to get my hair to grow but as much as it must do because I get roots, it never seems to get any longer!


What you will need to create your new look!
To help you easily apply your new Halo Hair Extensions you will need a brush, a parting comb, some clips and your straighteners if your going for the 'straight hair' look. For the purpose of this post I am keeping my hair straight to show an everyday look.


I love that Halo Hair Extensions include instructions with their products. Even if you know what you are doing with extensions and can apply them with your eyes closed; its good to have something to look back on. These instructions provide you with general guidance on how to apply your halo hair. Some people choose to apply theirs in different ways, its completely up to you as you will know where your hair needs more extensions once you start to put them in. 
*Please ignore my horrendous roots in photos that you are about to see, I am booked in and waiting to get my hair done- which can't come quick enough!! Also the lighting is funny in some of the photos as today has been quite a gloomy day and it has gone from dull to sunny to dull and so on. Some of the photos you see you may think 'omg those extensions do not match her hair colour' but trust me they do. I just have so many different blonde/brown shades in my hair and like I mentioned above the lighting shows them in different colours. The end product photos are more natural and you can see the colour match much clearer*

Step 1
Gathering your Halo Hair Extensions together.

When I get new hair extensions, I am always so excited to open them! First you need to untie them from the packet.  Be careful that you do not cut any hair off when trying to cut the ties!


The next thing I like to do when applying my hair is sort out the extensions into piles which have the same amount of clips in. This just makes applying them easier as you can see which ones you still have left in terms of width.
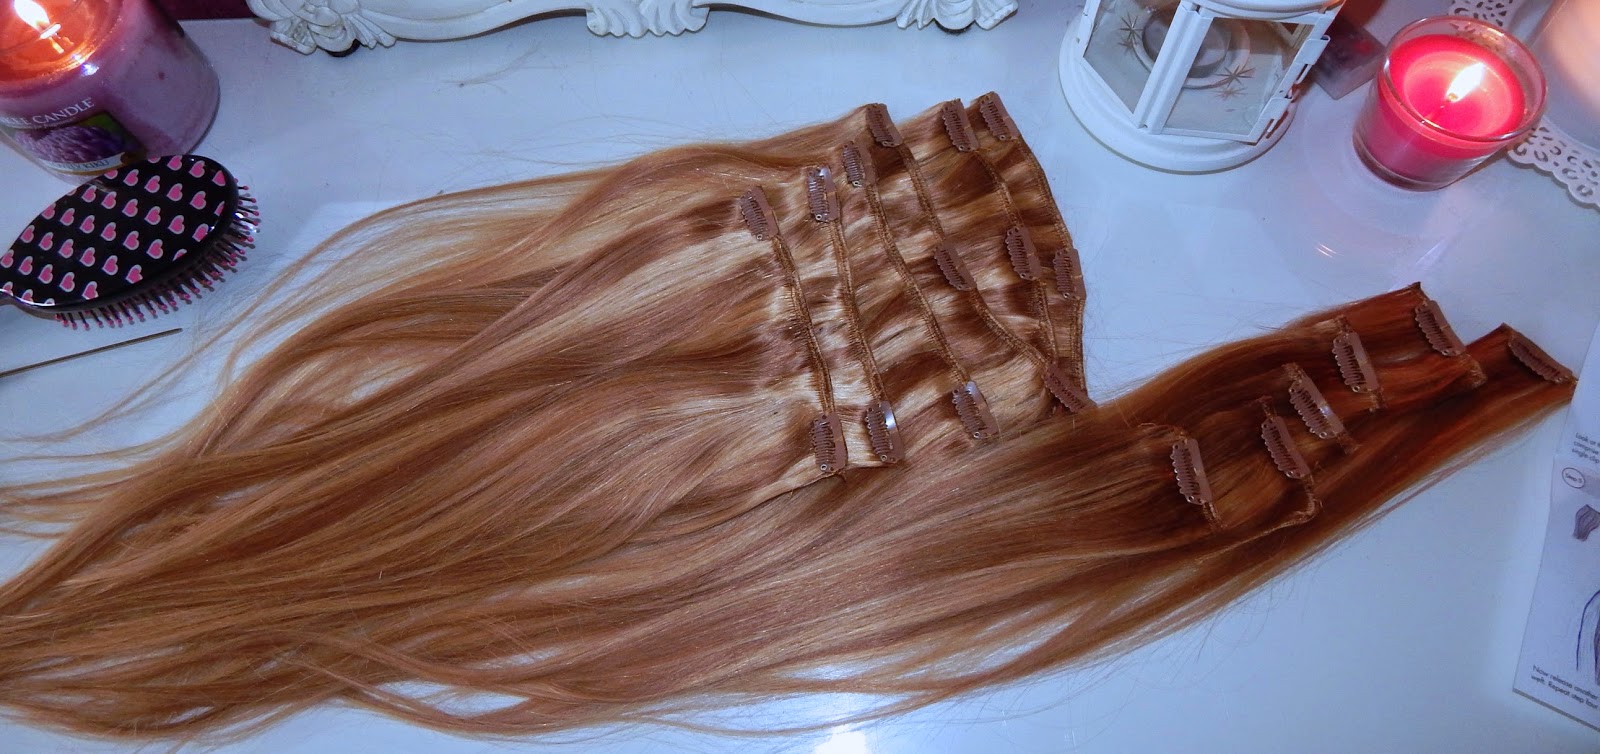

These extensions as mentioned in my Halo Hair Extensions Part 1 post are in the shade Golden Brown/Sweedish Blonde Mix - #12/20. They are 20" long, and cost £99.99 to buy as part of their Deluxe clip- in set. The photo above shows them to be a lot more browner than blonde, but they aren't its literally just the lighting. They are a lovely mix of brown and blonde shades.

Step 2
Applying your Halo Hair Extensions.

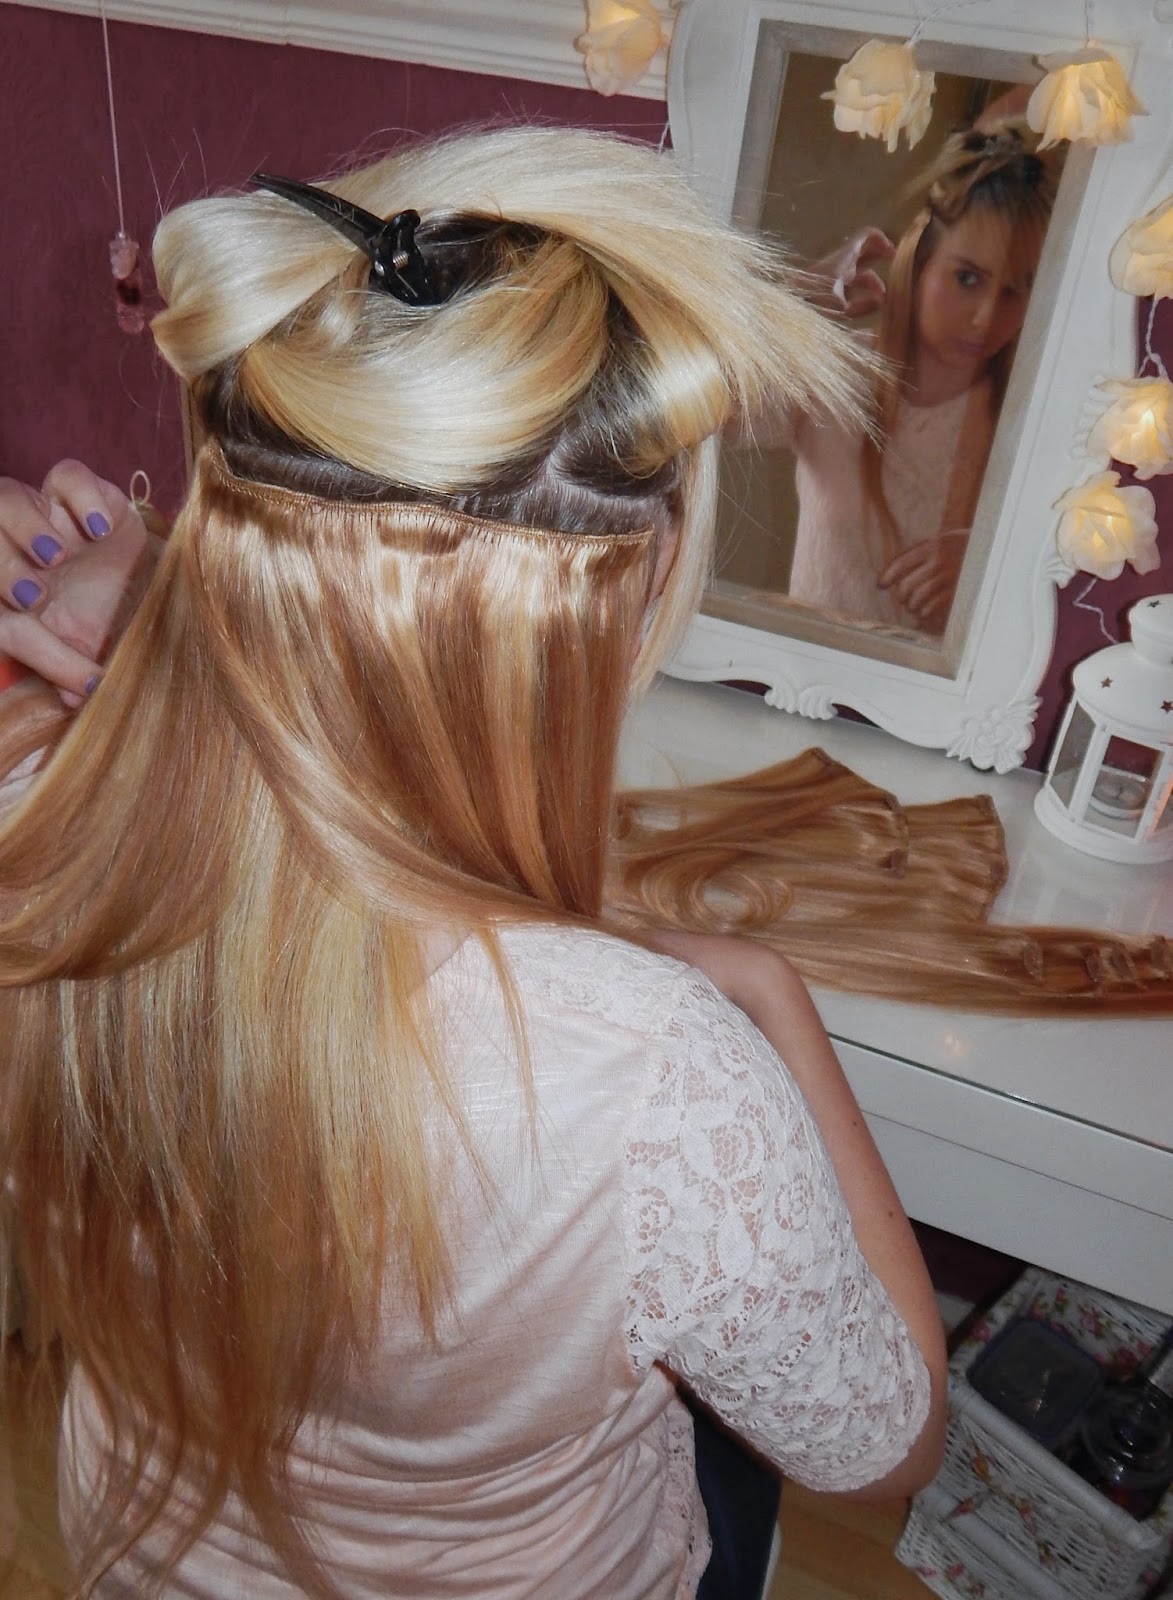
First either using your fingers or a separating comb, tie up the majority of your hair leaving the bottom strand free. The idea with extensions is that you work your way from the bottom up to the top.  Here are those nasty roots that I have warned you about... I have been trying to be good and not get my hair coloured as much to try and let it grow, but because of that I now have major root-age going on! This post is as real as it comes, I obviously could not hide away my roots as I needed to show a separation of the hair picture. We're all girls anyway right and have seen them before?!


After separating your hair and clipping it up, you need to start off with the extensions that contain 'two clips'. The set that I am using is a Deluxe set and contains 12 hair pieces! Perfect for my hair because its so thick. Pick up the extensions piece, open the clips and grab them onto your hair then close them. Its as simple as that!


Here you can see the fitting close up. I attach them right to the top of the hair as this prevents them from slipping down and gives a tighter fitting. Once you have applied your first one. Separate and pull another layer of hair down and do the exact same as above. You use all of your 'two clip' pieces until you get to the top of your ears.
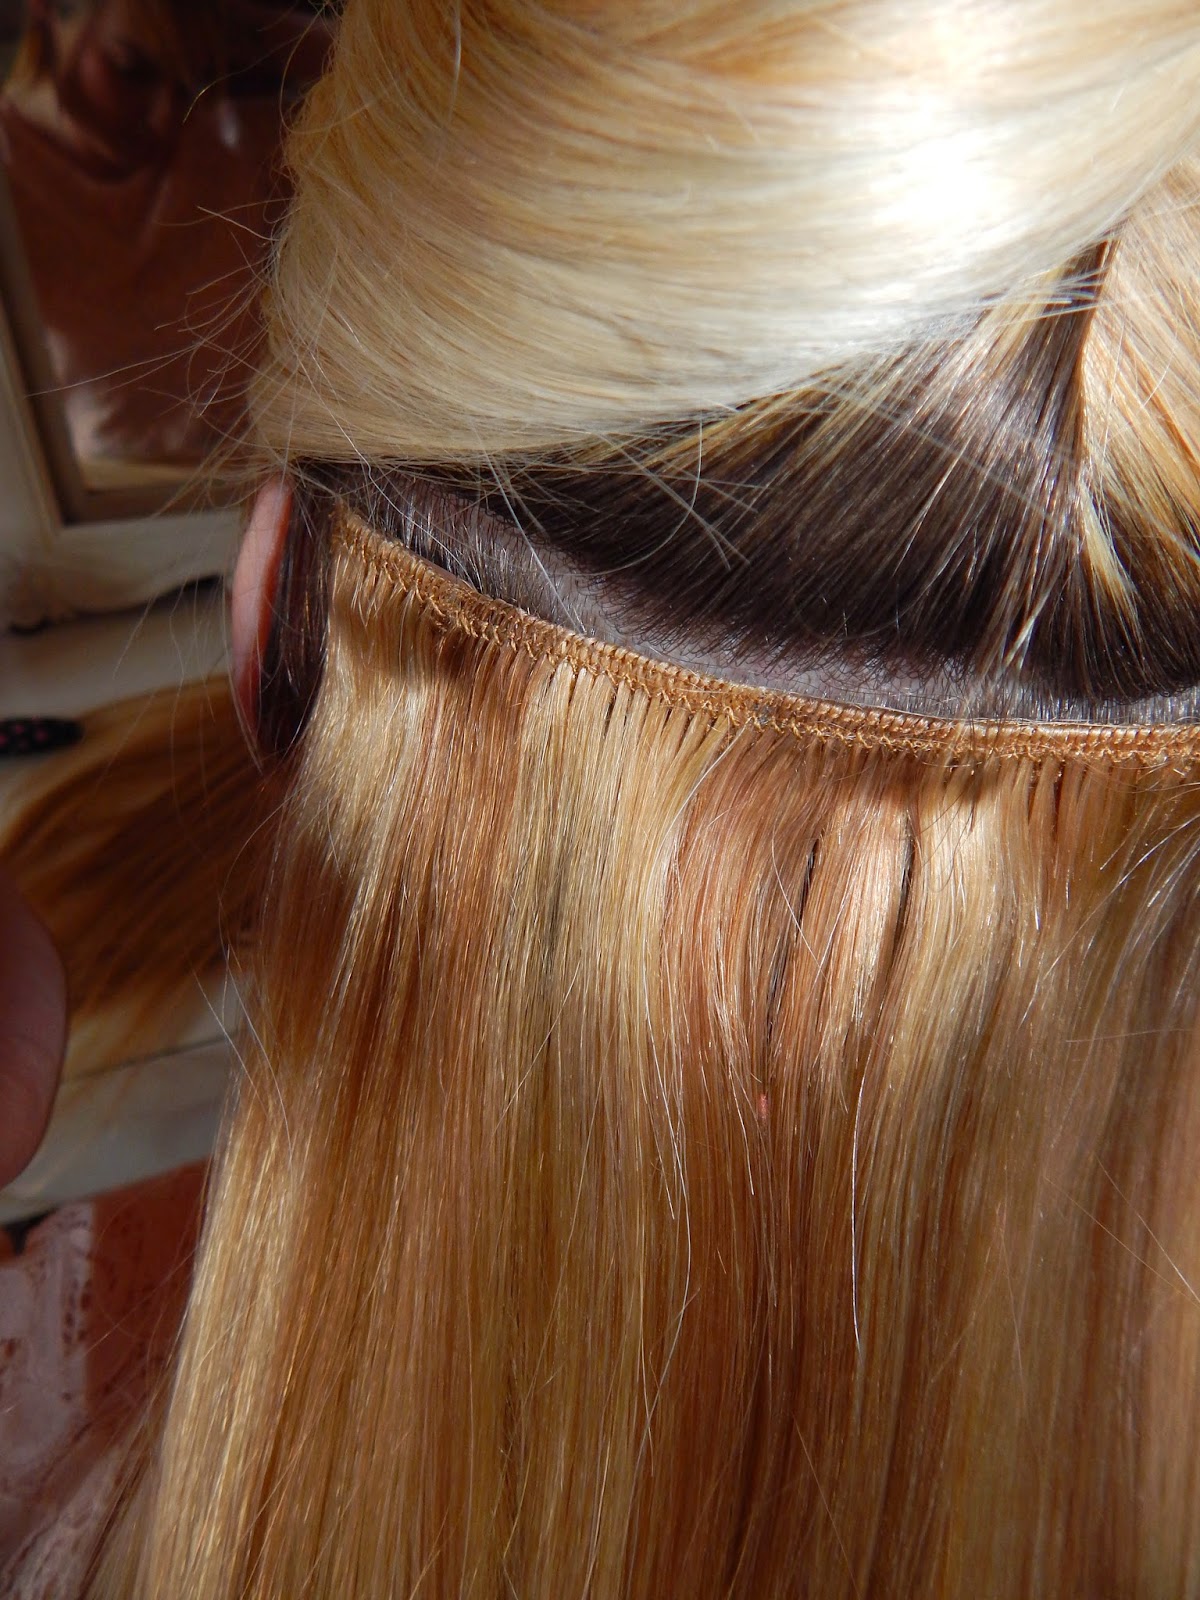


What I have noticed when applying my Halo Hair Extensions is that the clips are firmly attached to the extensions. I have brought some hair before where the clips were originally attached, but after applying them they became loose and eventually I had to sow them back on. This is not what you want when you pay out all that money for lovely hair. These clips are attached well and you can really feel the grip when you place them in your hair. 
Once you have used up your 'two clip' hair pieces. Its time to move onto the pieces of hair that contain 3 clips. These are wider to fit around your head as you continue to work your way up to the top of the hair. Separate your hair now so that all the hair that is above your ears is clipped up. This is obviously the middle part and for me this is my main area where I need to apply lots of hair pieces to keep it looking natural with my hair being so thick. 


 The hair pieces with 3 clips attached are my absolute fav. This is because they cover almost all of your own hair, meaning it is all hidden and you start to see the beautiful hair that you are now wearing! Start from the side and work your way around placing in your '3 clips' pieces. Once you have covered the layer of hair all around ... separate and pull another layer down and do the same again! You should use all of the '3 clip' pieces, and hopefully like me you will find that now all of your hair has been filled with your new halo! Once you have finished these steps pull down the last top layer of your own hair and it should hopefully blend in with your long locks!
After concentrating on the back of your head, its time to finish off by using the '1 clip' pieces to fill in from the front your hair that is around your face. 
Here you can see what I mean about the lighting from todays weather! Excusing that... once you have used your single clip-ins at the sides of your face... Your halo is officially in!


Step 3
Styling your new halo hair!

There are so many different styles you can create when you have long hair. For me my two favourite styles are straight and wavy. I like to keep it simple as just having that added 20" long hair is a bonus alone for me, and Im happy to keep it plain and simple. Start by brushing your hair. This blends in any of your own natural hair that may be poking out. I sometimes have to separate my hair at the sides again to straighten it out which is what you can see me doing below. 


For this post I chose to keep it straight to show a natural day to day style as I mentioned at the beginning, but here is how I finished off my look...


 I absolutely love my Halo Hair Extensions. Regardless of some of the funny shades of lighting on my photos, from the two above you can see how naturally they blend in with the rest of my hair. I love a mixed blonde look rather that one plain colour. Not only do I now have lovely long hair, the actual hair itself that is 100% Indian Remy Human Hair is so so soft!

Here are some before and after photos for you to see the difference a halo can make! I have loved being a part of Project Halo!


*You can find Halo Hair Extensions using the following links*
xxxx
*This post comes to you as a review - products sent to me by Halo Hair Extensions in relation to Project Halo*

Sunday, 29 March 2015

Halo Hair Extensions - Part I

So after lusting over long hair and wanting some new hair extensions, Ive finally got myself some new ones thanks to 'Project Halo'. I have been given a great opportunity to work with Halo Hair Extensions :) Im forever looking at different companies for hair extensions but Im always really wary of ordering any online without seeing them and making sure they match my hair colour. After discovering Halo Hair Extensions I was amazed at there products online. They have so much variety to choose from! So who are Halo Hair Extensions?
Halo Hair Extensions is an online company working to provide girls with the best Halo in town; their motto "Every girl deserves a halo''. I certainly need a Halo as my hair is awful without any extensions in and is simply plain boring. You can find their website here. They provide hair that is '100% Indian Remy Human Hair' as they believe 'they are the finest extensions in the world'. Their website is really helpful. There are so many links available to you from customer reviews, how to videos,  the actual products available to buy, help on choosing the correct shade of hair; and so much more!
Halo Hair Extensions provide four main options of hair to choose from; Halo, Deluxe Halo, Clip-In & Deluxe Clip-In. They also offer micro loop and stick tip, but you can find out more about these online. After a few emails discussing what kind of hair I would like and what colour we thought was best, I was amazed at how fast I received my parcel! I was so excited when the post man knocked on my door with their distinctive packaging!


Heres a few photos of my first views when opening my Halo Hair Extensions. I knew straight away I had got my halo delivery thanks to their clear packaging! I love the big logo on the front of the box, it makes it stand out.


When I opened the box I smiled instantly.. How pretty did it look! You can tell that time, effort and care has been taken when packing their products. I think that presentation is such a vital element for companies. They need they products to live up to their name, but I think its also important to make sure they are presented in the best way possible. When I opened my box I saw beautiful purple tissue paper that was wrapped around my hair extensions with such a pretty bow! They even included some halo shampoo and conditioner, and a comb to help maintain the hair! 


Along side the lovely extra treats included , another vital thing was inside; instructions. Everyone needs instructions, just incase! Even if your a pro and know what your doing, its always good to have something to look back on! These tell you how to apply your hair, and also include tips on how to keep them looking nice and healthy!


I was super impressed when I saw that Halo Hair Extensions had included shampoo and conditioner in their parcel, and also a comb! Their mini bottles are super cute and of course have their trusty brand names on them! The comb that they have included is fab for applying hair extensions as it allows you to neatly section your hair into parts. 


Once I could allow myself to tear away the pretty purple tissue paper, I then saw my halo. There it was boxed up nice and safe waiting for me! 


Once again the packaging I cannot fault at all. Not only does it tell you a little bit about your halo, it also includes links to where you can find them if you need any help!


I decided to choose the GOLDEN BROWN SWEEDISH BLONDE MIX #12/20 shade purley because my hair is so many mixed colours. Overall I would say it is blonde, but it has a lot of different shades of blondes and also some browny shades mixed in too. I think these will be a perfect match and I can't wait to try them out. Don't worry if you choose a shade and once it arrives you think it is totally the wrong match for your hair.. as long as you do not untie them from the box you can change them! These extensions are a Deluxe set- meaning they are thicker for those with thicker hair. My hair is short but so thick, so I really needed this set. Its important to get the right amount of hair you need to make it look as real as possible. 
I chose clip ins out of the other products that were available because I am used to them. I have seen so many girls wearing extensions with their clips still visible, its the only downside to them. This can be avoided though if you place them in correctly, and its super easy. My 20" extensions have 21 clips and contain 12 pieces of hair. The clips are already attached so you don't need to worry about doing this yourself... they have done all the hard work for you! As mentioned above the hair is 100% Indian Remy hair, giving super quality. I think £99.99 for these is a bargain, because in the past I have been paying this for hair that is not this long, does not come with as many clips, isn't as thick and also doesn't come with any added extras! When you buy your halo they really look after you!


I will be doing a part II post for my Halo Hair Extensions which will focus on how to apply them, and before and after shots.. so be sure to check back!

In the mean time you can find out more about Halo Hair Extensions and their fabulous products using the following links!

Will you be ordering yourself a halo?

xxxxxx

*This post comes to you as a review - products sent to me by Halo Hair Extensions in relation to Project Halo*

Thursday, 24 April 2014

A little snippet of today!

 So this post is a little different, it is a little snippet of pictures and a few words to sum up my day.
After doing some work this morning I decided to have a wander into town. Heres some photos of my OOTD…


Kimono- PRIMARK - £13.00
Statement Necklace- PRIMARK - £3.00
White Vest Top- PRIMARK - £1.50
Indigo Ultra Soft Jean- MISS SELFRIDGE - £36.00
Glittery Jelly Shoes- PRIMARK - £4.00


I chose this outfit as it is just a nice, comfy and casual outfit to go out in the day in.
Once I popped into town I didn't have long as I had to be somewhere else so I darted to two shops that I knew wouldn't fail me. Heres what I got…


Gingham Skinny Jeans- PRIMARK - £13.00 each
Light Pink Mini Structured Tote Bag- River Island - £30.00

When I reached PRIMARK I casually walked through having a little nose… Then all of a sudden these beautiful items caught my eye! For so long I had been wanting some checkered skinny jeans, & I had seen some at Topshop a while ago but I always put them down due to the price tag! Basically the ones I had wanted for some long were the Gingham check & were £38 a pair (they come in different colours) and I just couldn't justify spending £76 on two pairs of jeans! Anyhow when I glanced my eyes over onto the Denim matt in PRIMARK I came across pretty much the exact same jeans but for a cheaper price! At £13 a pair I would of been silly to of said no!
Then I headed to the beautiful River Island and here my amazing purchase!


This bag is to die for! For one it is a baby pink; my favourite colour, two it is a nice small size but it still has 3 spacey compartments and three I just love it! £30.00 is such a small price to pay for such beauty, I  can't wait to use it!

After I headed on to my other jobs I then returned hair and decided to colour my hair and do my nails! 


Fashion nails- PRIMARK - £1.00


I adore these nails they are so funky! I have blogged about the PRIMARK fashion nails in more detail which you can find here and here.

So thats my day, in a snippet!
I hope you've all had a great day, sorry its short!

Have you brought any Primark bargains recently?

xxxxx


Sunday, 26 August 2012

Gone to the dark side!!

Okay my lovely's so my last post was to inform you that I was changing my hair colour, this post is to let you know I've been brave and I've done it! I've gone back to the dark side!!

I used 'Natural Dark Auburn, 112- Nice & Easy' ... My hair has turned out a little darker than expected but I think that's because I left it on too long to make sure it went brown from being so blonde!

I do really like it, it's a big change! I feel it gives me a little more colouring in my face!
Here's a few pictures below...


^^ Before & after!
 let me know what you think? :) xxx

Saturday, 25 August 2012

Changes in my life...

Hello my fellow bloggers, it's been a while, a long while. I apologise for my absence, I've just not been myself recently and felt really out of it so my blog took the fall for it but I'm feeling better in myself now so I'm going to think of some new blog posts for you all.

This little post is just to let you all know about a change that's going to be happening... I'm going to change my hair! I've been blonde for so many years of my life, I went brown then black then back to blonde, but I've just had enough of my hair looking yellow, and having to keep on dying it because of having dark roots... It's such a nightmare; especially trying to get it all the same colour without it going golden/gingerish. So from being fed up with it I have decided to go a nice auburn colour! I think I'm going to do this monday.. You've obviously seen pictures of me with my blonde hair, but il do a before and after post once it's done, but the colour I've chosen is below! I'm quite excited but mega scared too! I just feel like I need a big change ready for my new job in just over a week, and seen as I think summer has officially gone, I love the thought of having darker hair for the winter :)


Hope your all well! Bye bye till the next time :) xxxx

Wednesday, 18 January 2012

We turn our back and whip our hair...

Okay this blog is going to start with a question...

Are side buns still in fashion?!


Please ignore the mess behind me in this photo, i was in my mums room!

Anyway the other day i didn't know how to have my hair. It was too windy for it to be down so i decided on an up do, but then i thought; up do's are boring now... so there i found myself putting it in a bun... which ended up on the side of my head!
I do like the way it looks on this photo, I'm just unsure as to if it is 'chavy' or not... I'm all for buns, but I've not worn one on the side since forever! I did end up pulling it out of the bun and just putting it in a pony tail because of my unsureness ha!

As you can see my pink is still in my hair! Its faded a little now, but i shall post some pictures from when i first had it done soon :)


xxxxx

Saturday, 19 November 2011

Im as free as my hair...


So as you all know a while back i decided to try out a new product that Lee Stafford had launched. Basically it is called 'For hair that never grows past a certain length; treatment' (£7.99 for 200ml)  ... You can find my review on it here. It is simply a cream treatment that you put on between washes which helps to strengthen your follicles on the scalp to allow your hair to grow to its potential length. Im still using the same pot of this as i haven't been using it that much because i had my hair cut quite short, but for the past couple of weeks i have used it frequently and shall continue to do so.
Anyhow the other day before work i was wandering around boots and i noticed that some of the hair care products had offers on, and some of Lee Stafford's was included in this. I decided to purchase the 'Hair Growth' shampoo and conditioner so that i can get the maximum effects out of using all of the three products. The shampoo and conditioner retail at £6.99 each, but the current offer was two products for £9!


The shampoo and conditioner bottles are both 200ml bottles, so there is not much in terms of it being quite expensive for a shampoo/conditioner. The packaging is clearly pink just like the treatment tub, which i really like as it makes it stand out. The shampoo and the conditioner does have slightly more information on the packaging informing you of what it actually does...

'This scalp stimulating, moisture balancing shampoo with Hydrolyzed Wheat Protein, helps to stimulate blood flow to the root of the hair, giving better body and leaving your scalp and hair feeling softer, smoother and healthier'
'Apple and Lemon Extracts add shine to your locks, whilst antioxidant Green Tea Extract helps protect your hair from environmental and heat damage, reducing free radical formation caused by UV and heat styling'

Ive used this product today for the first time. Im not too sure on my opinion at the moment as it is kind of a mixed reaction. My hair has gone super straight but still has volume which is always a bonus, but at the same time it does feel a little dry. I suppose i can't complain as it is not a normal shampoo conditioner which is quite thick in texture making your hair soft...  the whole point is to make your hair grow. Alls i can do for now is continue to use the products and once they have all ran out i shall let you know my thoughts, and whether i shall be continuing to buy them! I am hoping for them to work as i do want my hair to grow; dying it doesn't really help though!

Have you tried these products before? xxxxx
(All prices based on Boots)

xxxxxx

Link within

Related Posts Plugin for WordPress, Blogger...