So hopefully you will of all seen Part 1 of my Halo Hair Extensions post... Here I bring to you Part 2! In this post I will be including some before and after shots of my hair, and a simple step by step guide to applying your halo extensions and achieving a natural look!
Here is me with my normal day to day hair! No hair extensions; all real! I hate my hair because It never grows past a certain length and so because of this I love to invest in hair extensions to give it more length and volume. I have tried everything to get my hair to grow but as much as it must do because I get roots, it never seems to get any longer!
What you will need to create your new look!
To help you easily apply your new Halo Hair Extensions you will need a brush, a parting comb, some clips and your straighteners if your going for the 'straight hair' look. For the purpose of this post I am keeping my hair straight to show an everyday look.
I love that Halo Hair Extensions include instructions with their products. Even if you know what you are doing with extensions and can apply them with your eyes closed; its good to have something to look back on. These instructions provide you with general guidance on how to apply your halo hair. Some people choose to apply theirs in different ways, its completely up to you as you will know where your hair needs more extensions once you start to put them in.
*Please ignore my horrendous roots in photos that you are about to see, I am booked in and waiting to get my hair done- which can't come quick enough!! Also the lighting is funny in some of the photos as today has been quite a gloomy day and it has gone from dull to sunny to dull and so on. Some of the photos you see you may think 'omg those extensions do not match her hair colour' but trust me they do. I just have so many different blonde/brown shades in my hair and like I mentioned above the lighting shows them in different colours. The end product photos are more natural and you can see the colour match much clearer*
Step 1
Gathering your Halo Hair Extensions together.
When I get new hair extensions, I am always so excited to open them! First you need to untie them from the packet. Be careful that you do not cut any hair off when trying to cut the ties!
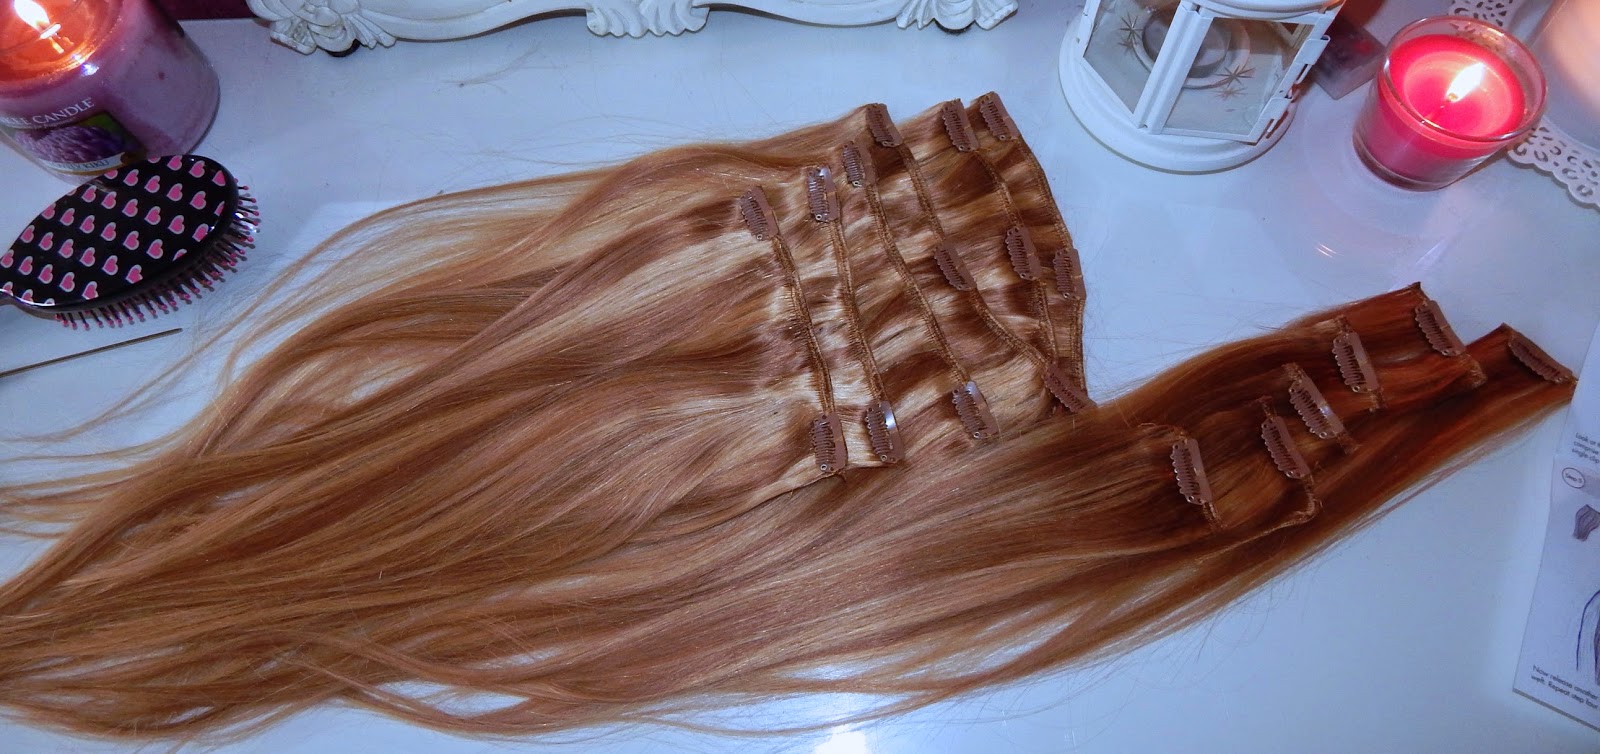
The next thing I like to do when applying my hair is sort out the extensions into piles which have the same amount of clips in. This just makes applying them easier as you can see which ones you still have left in terms of width.
These extensions as mentioned in my Halo Hair Extensions Part 1 post are in the shade Golden Brown/Sweedish Blonde Mix - #12/20. They are 20" long, and cost £99.99 to buy as part of their Deluxe clip- in set. The photo above shows them to be a lot more browner than blonde, but they aren't its literally just the lighting. They are a lovely mix of brown and blonde shades.
Step 2
Applying your Halo Hair Extensions.
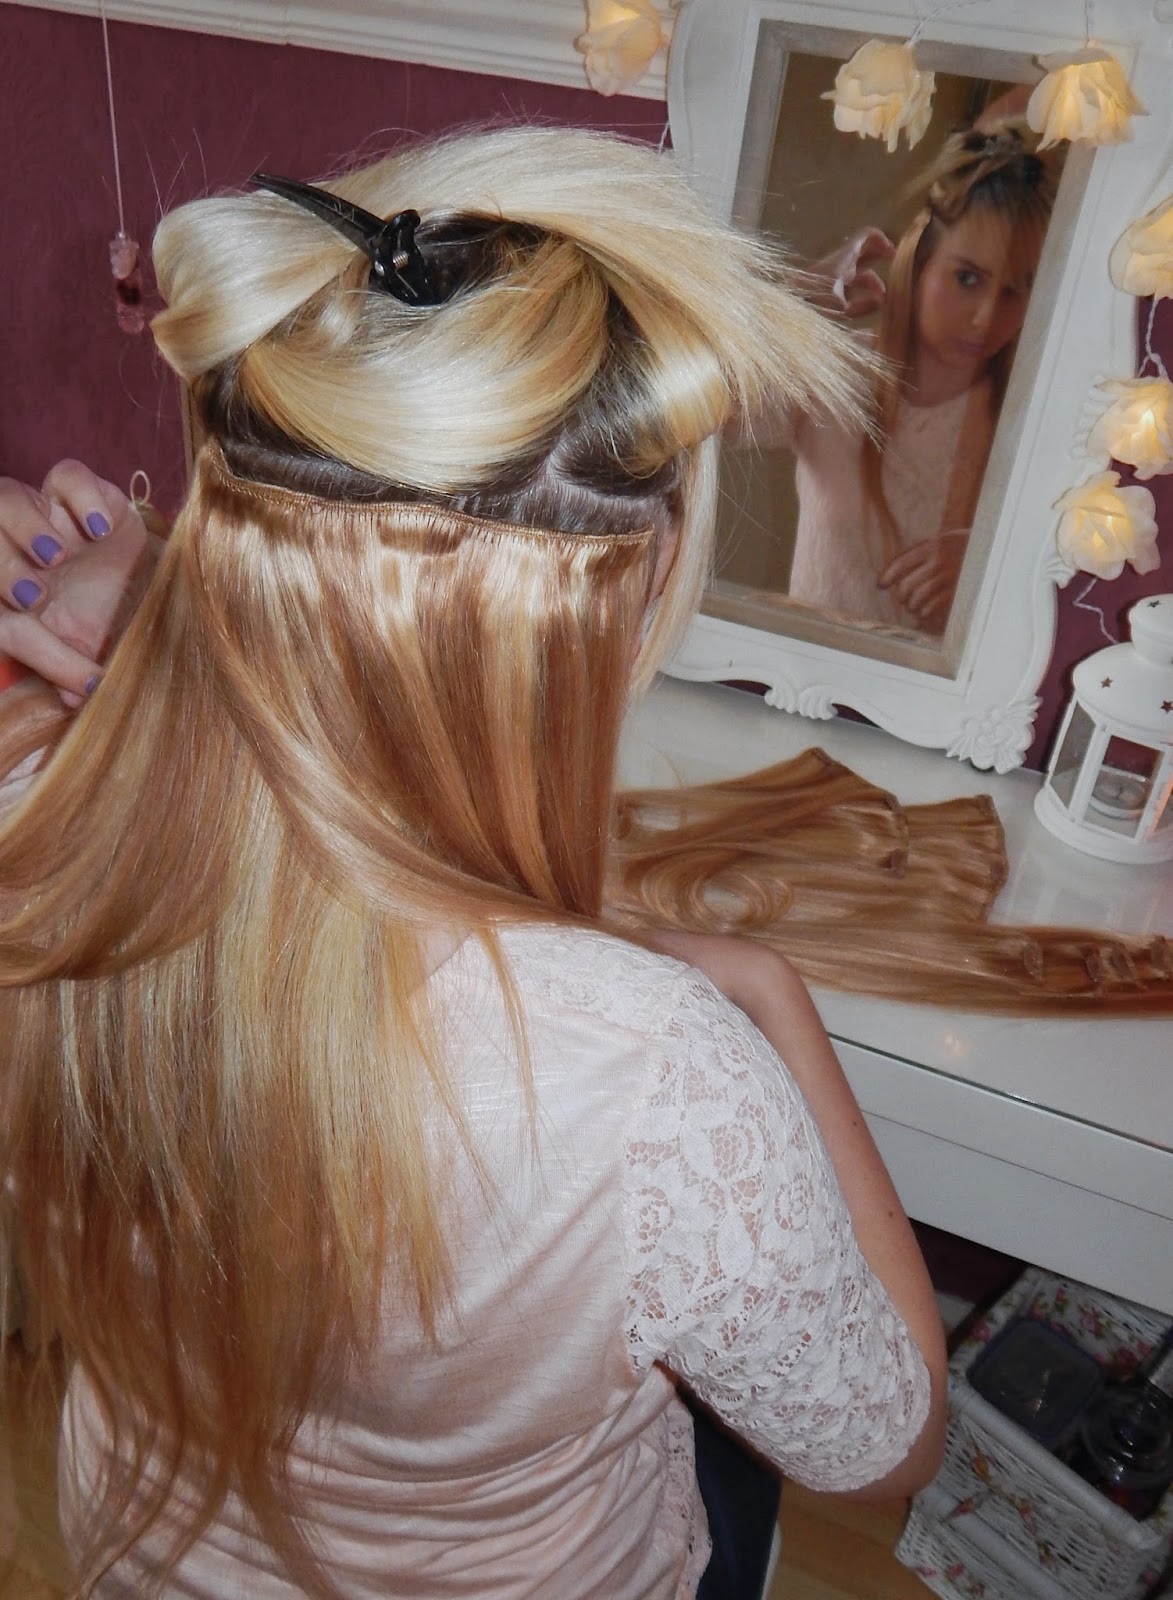
First either using your fingers or a separating comb, tie up the majority of your hair leaving the bottom strand free. The idea with extensions is that you work your way from the bottom up to the top. Here are those nasty roots that I have warned you about... I have been trying to be good and not get my hair coloured as much to try and let it grow, but because of that I now have major root-age going on! This post is as real as it comes, I obviously could not hide away my roots as I needed to show a separation of the hair picture. We're all girls anyway right and have seen them before?!
After separating your hair and clipping it up, you need to start off with the extensions that contain 'two clips'. The set that I am using is a Deluxe set and contains 12 hair pieces! Perfect for my hair because its so thick. Pick up the extensions piece, open the clips and grab them onto your hair then close them. Its as simple as that!

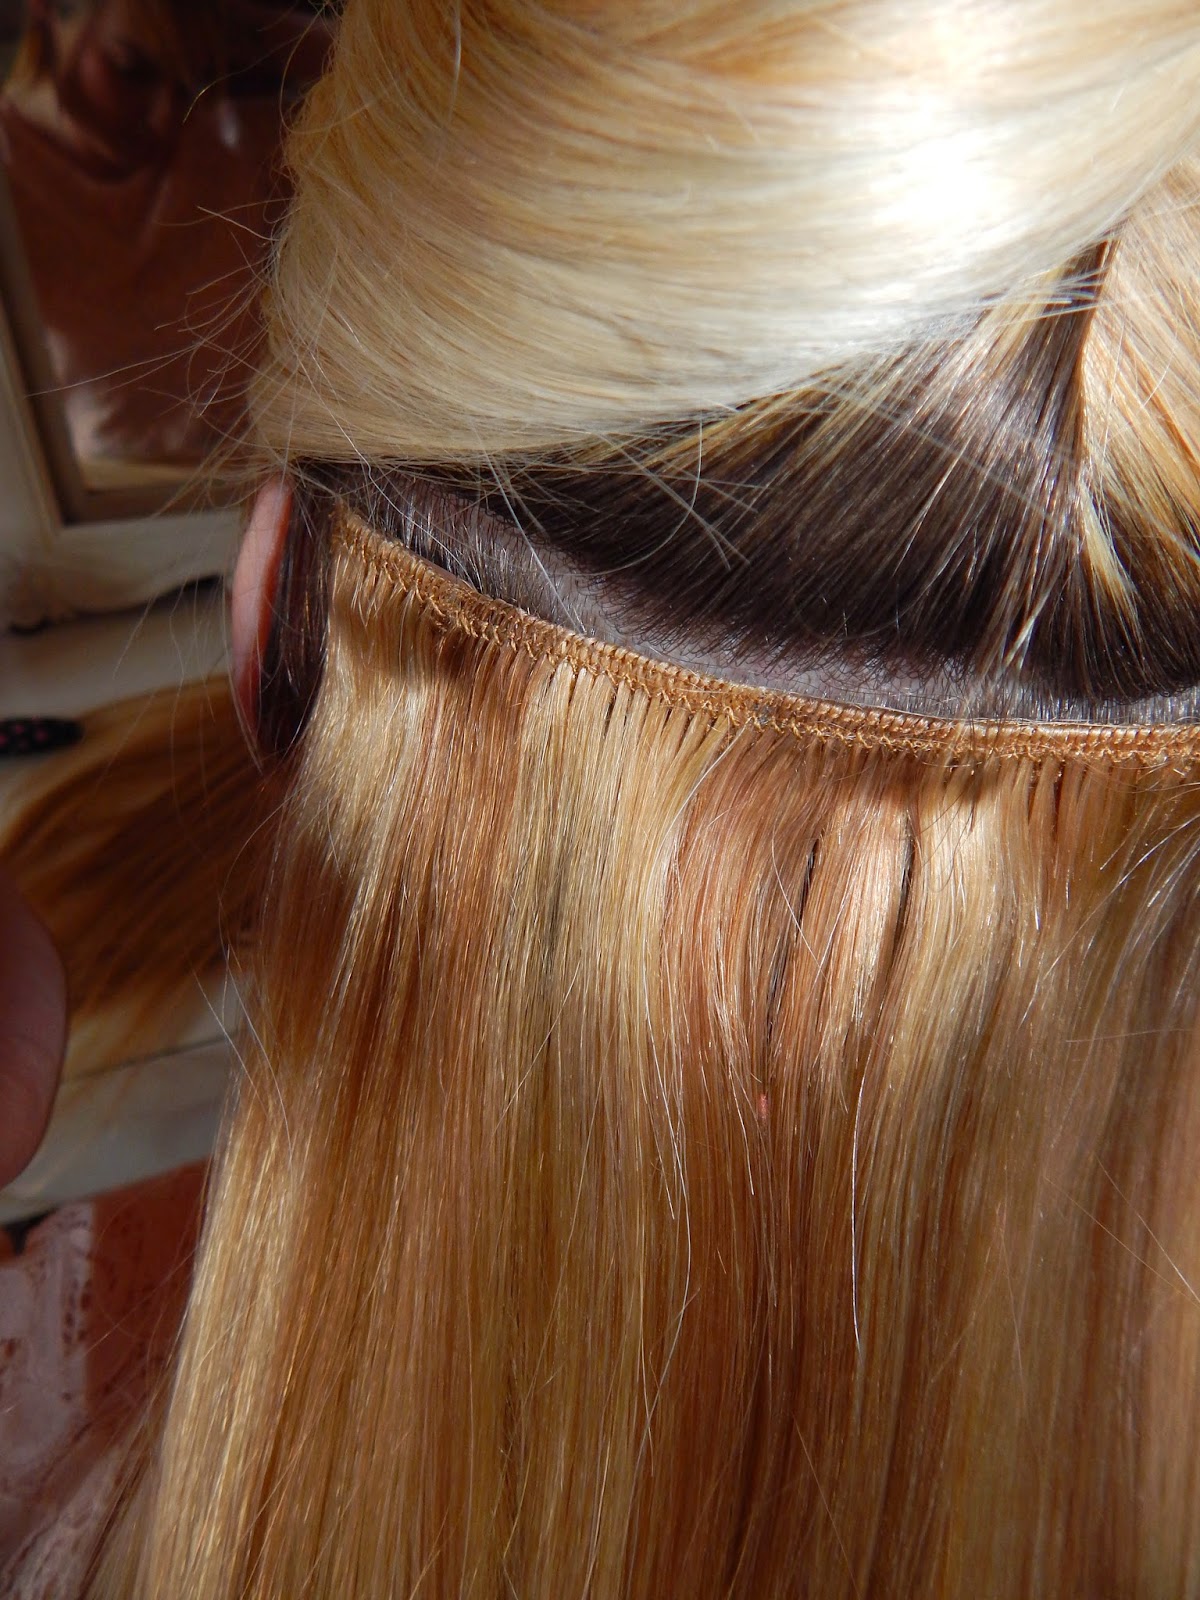
Here you can see the fitting close up. I attach them right to the top of the hair as this prevents them from slipping down and gives a tighter fitting. Once you have applied your first one. Separate and pull another layer of hair down and do the exact same as above. You use all of your 'two clip' pieces until you get to the top of your ears.
What I have noticed when applying my Halo Hair Extensions is that the clips are firmly attached to the extensions. I have brought some hair before where the clips were originally attached, but after applying them they became loose and eventually I had to sow them back on. This is not what you want when you pay out all that money for lovely hair. These clips are attached well and you can really feel the grip when you place them in your hair.
Once you have used up your 'two clip' hair pieces. Its time to move onto the pieces of hair that contain 3 clips. These are wider to fit around your head as you continue to work your way up to the top of the hair. Separate your hair now so that all the hair that is above your ears is clipped up. This is obviously the middle part and for me this is my main area where I need to apply lots of hair pieces to keep it looking natural with my hair being so thick.
The hair pieces with 3 clips attached are my absolute fav. This is because they cover almost all of your own hair, meaning it is all hidden and you start to see the beautiful hair that you are now wearing! Start from the side and work your way around placing in your '3 clips' pieces. Once you have covered the layer of hair all around ... separate and pull another layer down and do the same again! You should use all of the '3 clip' pieces, and hopefully like me you will find that now all of your hair has been filled with your new halo! Once you have finished these steps pull down the last top layer of your own hair and it should hopefully blend in with your long locks!
After concentrating on the back of your head, its time to finish off by using the '1 clip' pieces to fill in from the front your hair that is around your face.
Here you can see what I mean about the lighting from todays weather! Excusing that... once you have used your single clip-ins at the sides of your face... Your halo is officially in!
Step 3
Styling your new halo hair!
There are so many different styles you can create when you have long hair. For me my two favourite styles are straight and wavy. I like to keep it simple as just having that added 20" long hair is a bonus alone for me, and Im happy to keep it plain and simple. Start by brushing your hair. This blends in any of your own natural hair that may be poking out. I sometimes have to separate my hair at the sides again to straighten it out which is what you can see me doing below.

For this post I chose to keep it straight to show a natural day to day style as I mentioned at the beginning, but here is how I finished off my look...
I absolutely love my Halo Hair Extensions. Regardless of some of the funny shades of lighting on my photos, from the two above you can see how naturally they blend in with the rest of my hair. I love a mixed blonde look rather that one plain colour. Not only do I now have lovely long hair, the actual hair itself that is 100% Indian Remy Human Hair is so so soft!
Here are some before and after photos for you to see the difference a halo can make! I have loved being a part of Project Halo!
*You can find Halo Hair Extensions using the following links*
xxxx
*This post comes to you as a review - products sent to me by Halo Hair Extensions in relation to Project Halo*
*This post comes to you as a review - products sent to me by Halo Hair Extensions in relation to Project Halo*


I love your pink straighteners! x
ReplyDeleteTheEnglishRoseGirl.blogspot.com
These work really well!
ReplyDeleteLove Emily x / www.emilyy.co.uk
I can literally think of so many instances and examples to support my claim. But this is not about convincing others about my idea of beauty. cbd bath bomb and other gifts
ReplyDeleteOutstanding article! I want people to know just how good this information is in your article. Your views are much like my own concerning this subject. I will visit daily your blog because I know. It may be very beneficial for me.
ReplyDeletebest treatment for hair extensions
Im no expert, but I believe you just made an excellent point. You certainly fully understand what youre speaking about, and I can truly get behind that. menstyle
ReplyDeleteI learn some new stuff from it too, thanks for sharing your information. get code
ReplyDeleteHey!! We want to keep our hair looking sharp for the weekend. These best hair salon for balayage near me will help us look our best at the party. Get It Now!
ReplyDeleteTape-in extensions can be affixed in less than an hour, making them a high-performance option for adding length or volume. They're also easily removed and reused, meaning you can opt to restyle your hair or exchange the tape in hair extensions salons near me for a different color whenever you want.
ReplyDelete